
Every self-builder has their individual expectations and ambitions in terms of the final result of their Self Build project. The process of designing a home is very demanding and challenging, as it is a crucial stage that is responsible for making your vision a reality.
This is our series called ‘Home design: A step-by-step guide to designing your dream home’. It is based on a talk created and delivered by Allan Corfield for Homebuilding & Renovating Magazine, at the Homebuilding & Renovating shows. The series will take you through the three main stages of developing an empty plot into a well-organised construction site equipped with experts who can successfully build your dream home.
Read more about Allan and see where and when you can see him delivering talks and ask him for an advice regarding your project here.
GET YOUR BRIEF RIGHT
Before starting to create your project brief you need to think simply: “Why?”. Why do you want to build your home instead of buying it directly from a mass home builder? Every self-builder’s reason can be different. Some of them want to build a safe and joyful environment for their children. Others may want to build a house to then sell on, to gain maximum profit.
Throughout the whole project, it is important to remember ‘why’ you want to build your own home. By doing this it will help you get through the most challenging moments. There will be a lot of them.
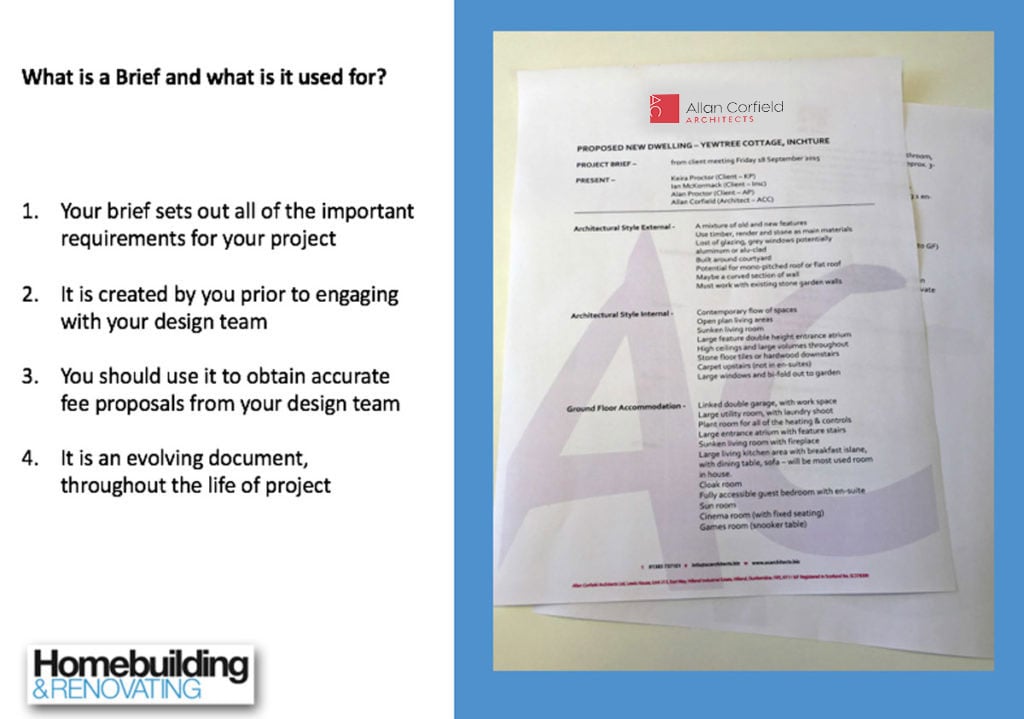
First, we need to answer the question of what is a brief and what is it used for. The brief sets out all of the crucial requirements for your project and needs to be created before you engage with your design team. The brief will help you obtain accurate fee proposals from your design team and will be an evolving document throughout the life of the project.
The first thing you need to include in your brief is the basic room information and room sizes. It is helpful to use the measurements of your current rooms, as long as they meet your expectations. The second aspect you need to consider is your building flow – the layout/structure of the internal rooms.
It is important to make sure that it will be consistent with your and your family’s lifestyle. For instance, if you need an open-plan kitchen connected to the dining room so that you can cook while spending time with your family and entertaining guests. Or a sheltered seating area outside with a gas fire pit and BBQ, so that you can enjoy BBQs with friends and family.


APPOINTING THE RIGHT STAFF
After completing the optimal brief for your Self Build, it’s time to look for the right people to help design your dream home. Before you start your Self Build project, it is crucial to make sure that you have sufficient funds. Speaking to financial professionals will help you organise the sale of your existing home, or/and take out a mortgage, and set the budget for your Self Build. Therefore, avoiding any unnecessary stress. Read our article presenting top tips for financing a Self Build project here.
We often advise our clients to consider appointing a quantity surveyor. Appointing this specialist should be treated as an investment, in which savings can be made throughout the construction process and once you are in your new home, will repay you many times over. This article will explain to you why and help you make up your mind whether you need a quantity surveyor or not.
Once your finances are in order you are ready to look for a plot for your Self Build. You may appoint a land surveyor to assess the plots you like, in order to choose the one that suits you best. It can help you to confirm the boundaries of your plot as well as the connection to basic services such as drainage, electricity and water. You can read more advice on how to find a perfect plot here.

An architect/architectural designer/an architect’s technician needs to be involved in each stage of your project. It is essential that an engineer is also involved. It is important that your appointed architect fully understands your lifestyle and preferences so that your vision for your home is achieved. More advice on choosing a Self Build architect here.
A structural engineer is also required for your Self Build as they play a key part in the design and are involved with the construction teams. A structural engineer is needed at the detailed design stage and during the process of acquiring a building warrant approval. At ACA we always suggest getting a soil investigation study completed on any site you are looking at or have purchased, as soon as possible.
An engineer will dig some trial pits around your plot and assess the quality of the soil and its bearing capacity. They can also carry out a porosity test, which involves filling a large hole in the ground with water a number of times and measuring how long it takes to sink into the ground. If the water does not drain away it means that you will not be able to use standard drainage solutions.
During the process of assessing the energy performance of your proposed home, your architect will need an energy consultant or Standard Assessment Procedure (SAP) designer. At this stage, all the construction elements of your Self Build, from the wall build-up to floor make-up, will be added to the location and heating sources in order to estimate the overall performance of your building. This will help to predict the heating demand and costs for your home.
Depending on the difficulty of the project and any contentious planning issues, you may also need a planning consultant. You may want a quantity surveyor to assess the detailed construction cost. It is worth to consider employing a heating engineer to develop a heating design. If you decide not to take the full self-build route a project manager will need to be appointed. For more information about appointing the right team, click here.

THE KEY DESIGN STAGES

After choosing the right team for your Self Build, it is time to go on to the key design stages. These are divided into four main areas. The first one is the initial design, second is the planning stage, third is building regulations and the final stage is the production or construction drawings. At ACA we have crafted the presented stages to give the self builder exactly the right amount of information and assistance to get the required approvals.
THE INITIAL DESIGN
During this stage, you as the client will be involved intensively with your architect or your designer. Read more about the cooperation with an architect here.
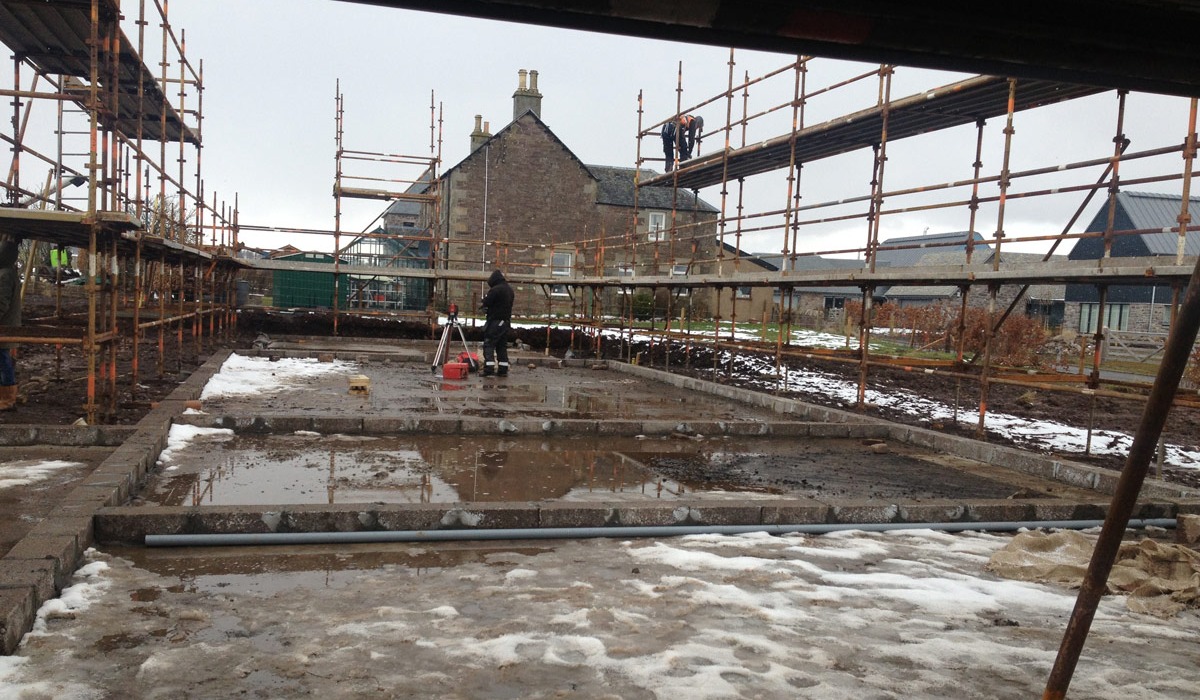
Following a review of the project brief, it is time to get an initial project timeline that states how the project is set up from start to finish. Then you will do a site review and soil investigation study on the site with the help of your engineer. It is important to get as much information about the site from the very beginning. It involves testing the bearing capacity of the ground and a porosity test to determine if the ground is suitable for natural drainage solutions. Your architect will go off with the information provided by you and produce initial sketch designs, these should be presented to you and reviewed – to check whether they meet your expectations.
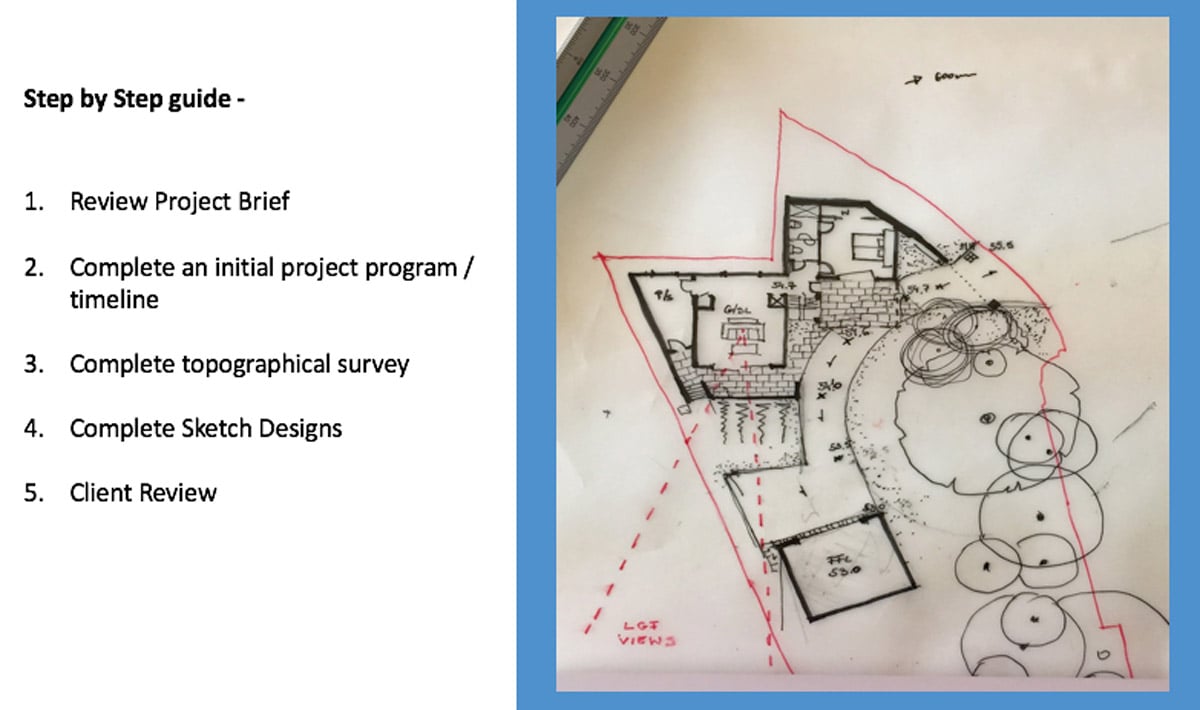
Remember that it is very important to communicate with your team regularly and review every design aspect of your Self Build. During the design progress, you should be looking to get 2D drawings including, plans, sections and elevations. It is helpful to get two main variations of an option from your designer.
Then you can choose certain bits of each in order to create a third and final option. If you do not like where the design is going you need to communicate it to your designers and they have to start again. To reiterate, you must love the design for your dream home.
Once your design is agreed, you may focus on organising an energy assessment to see what heating solutions are the best to heat your house. Another thing that is worth considering (at this early stage) is to involve a quantity surveyor or a contractor who can complete a budget cost exercise. If any contentious planning issues arrive, you may do a pre-application enquiry with the planning team.
This stage should last between three and eight weeks. After you are completely happy with the design, which meets all your requirements, you can proceed to the planning stage.

THE PLANNING STAGE
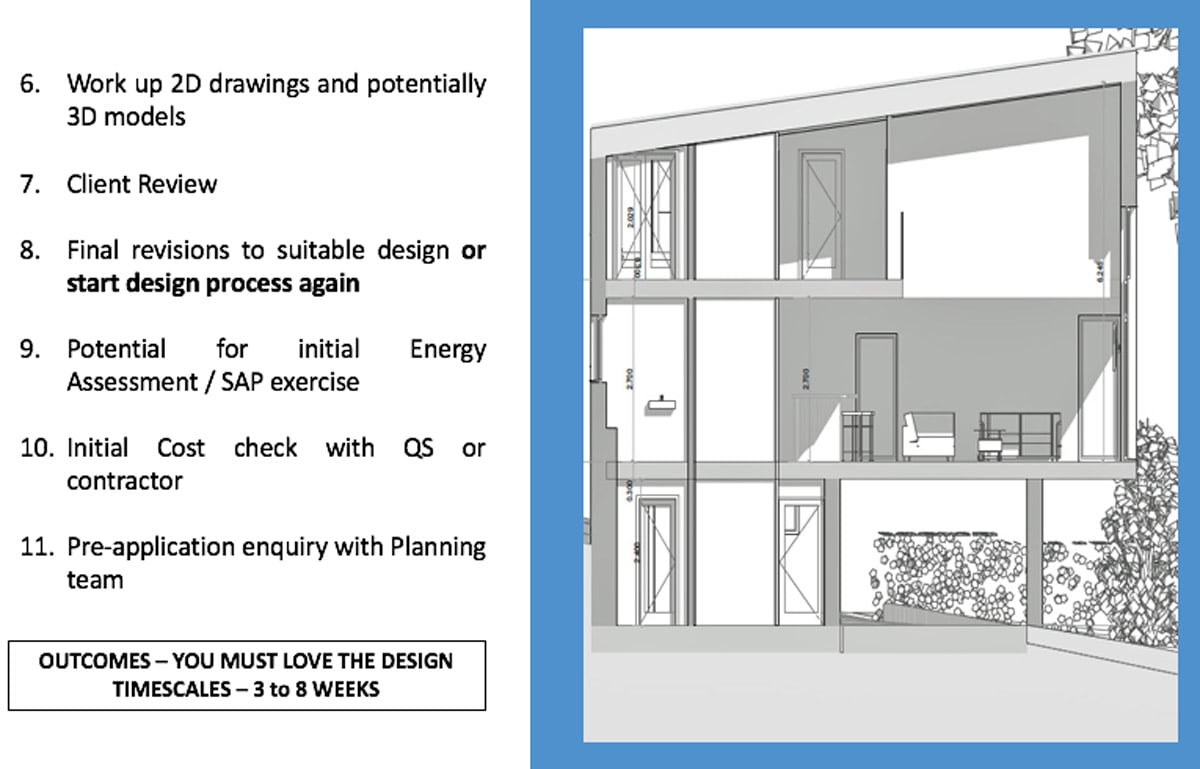
At this stage you will be working with your architect or designer, and the planning department will start to get involved. You will need a planning consultant if there are any contentious issues with the proposals or your site. The other specialists you may need to work with are a flood consultant, an arborist and an ecologist. This is a time to take a look at any relevant planning policies; is your plot green-belt, Conservation Area, or your Self Build has an exceptional architecture and can be pinned under Paragraph 55?
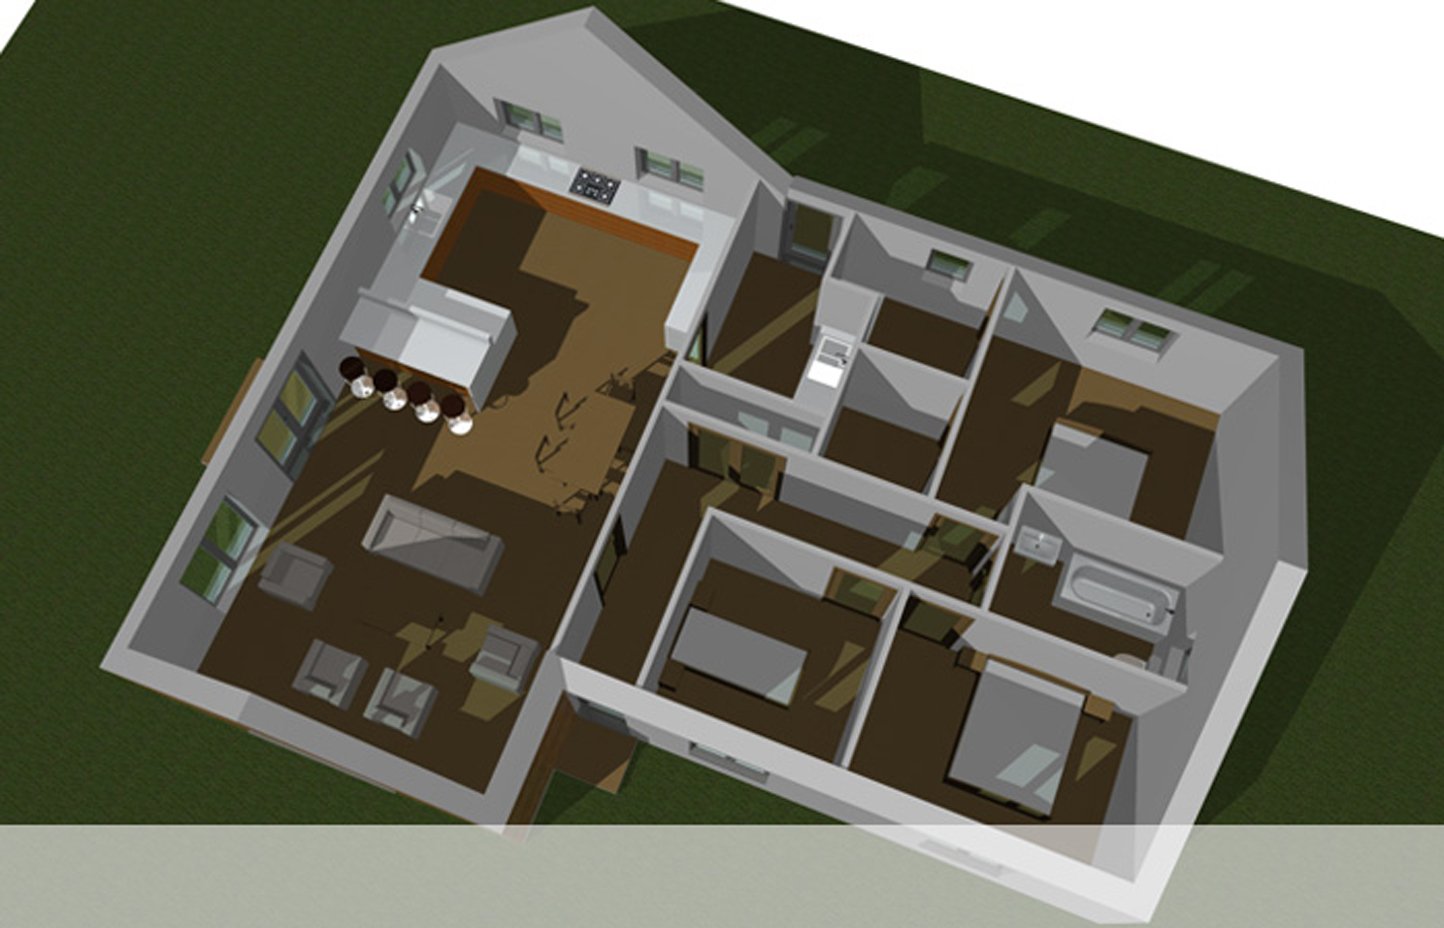
All the drawings and sketches from the initial design stage will be updated and 3D rendered models and images issued to you. Choosing an architect that works in a 3D drawing package, will show you the house on the proposed site and will give you an idea of what it is going to look like.
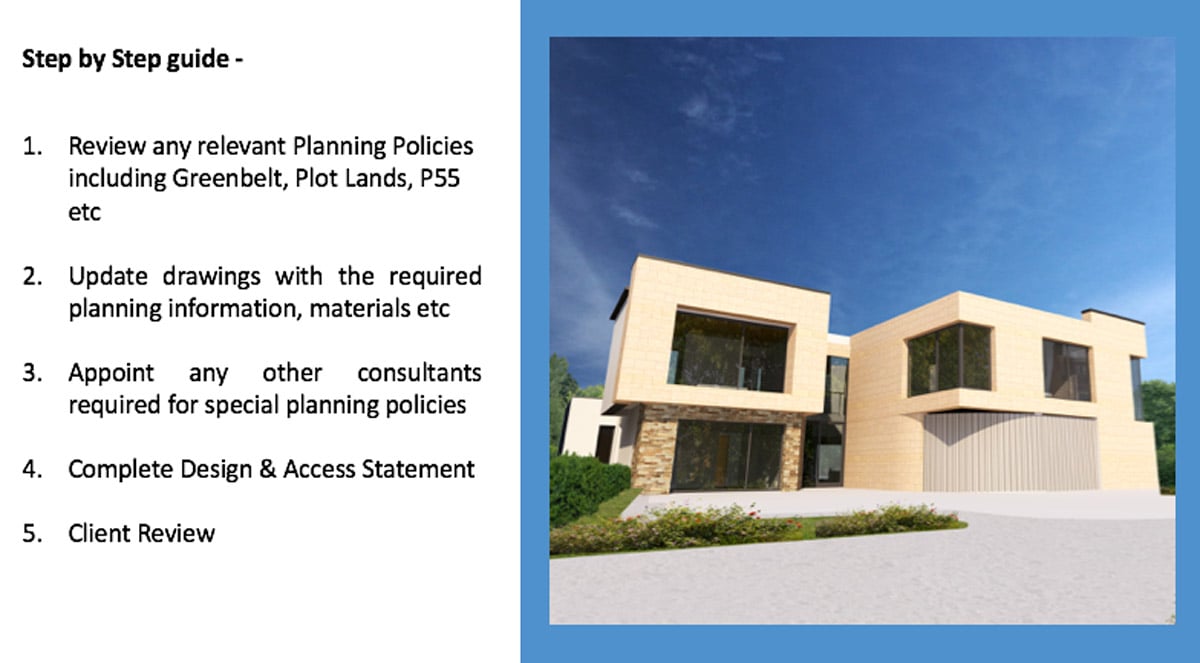
You may also consider appointing any of the other consultants needed to deal with the special planning policies. You will work on a design and access statement – this is a key document that goes in with the planning application. This document highlights the key policies, planning precedent, the design ethos, the access, and the basic requirements of the site.
It is a very detailed document and should be 10-15 pages of well thought out and well planned supporting information. It is advised to visit the neighbours personally just before submitting the planning application. It is always better to personally discuss your plans with them before they will see them on the planning portal (it also helps if you take wine or chocolates!).
The application document will be submitted via the online planning portal and it will be registered by the local planning authority. After it is checked and all the documents are suitable, the document will be uploaded onto the planning website. Then for a certain amount of time, neighbours will be able to see it and comment or send objections. Also at this time, the supporting documents and plans will go out to any relevant consultees of the planning department, Mining, Ecology, Transportation and Education etc.
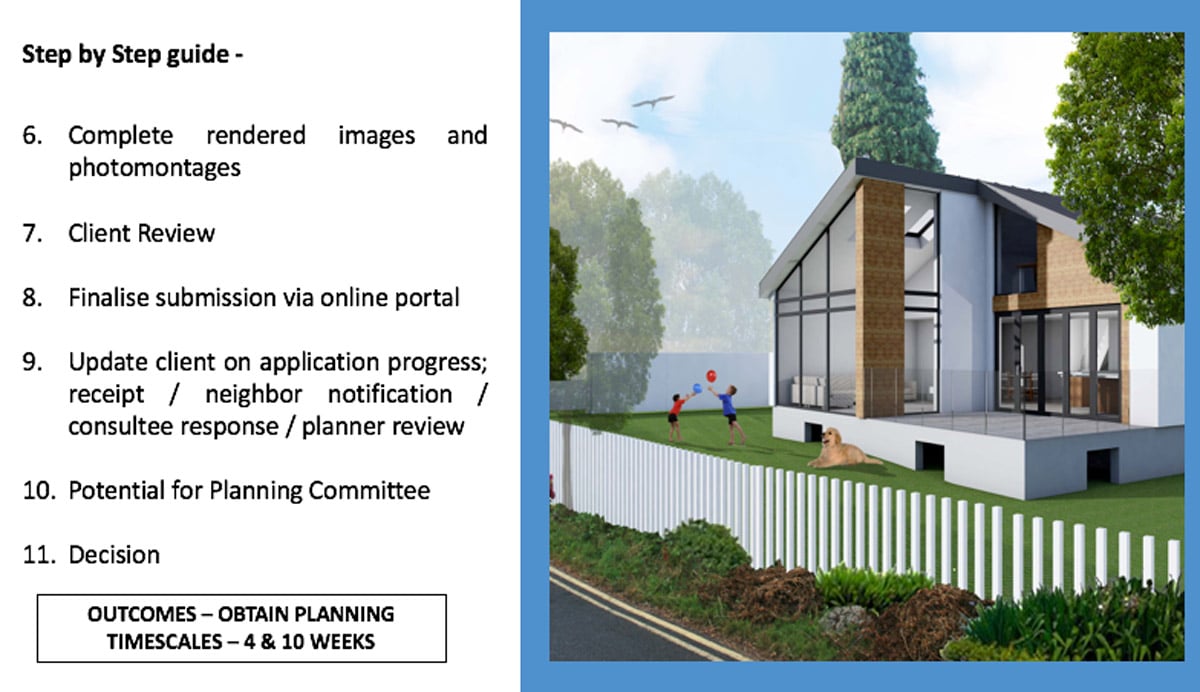
After the neighbours notification period has finished and the consultees responded, you will be able to speak to the planner about your case. Hopefully by the eighth week of the planning stage, you will get determination from the planning department, whether it is positive or negative. If your application got less than 6 objections (or 8 objections in Scotland) your application will be dealt with under the delegated powers, i.e. by the planners.
If you got more objections then stated, you will case will be reviewed by a committee, this can add a further 4-6 weeks onto the planning determination date. If the answer is negative, you will have time to review the documents and you can appeal the decision with the planning department or Government.
The planning stage can last anything from 8 weeks to 4 years depending on how it goes. After getting the planning approval you will be ready for the next stage. Read more about planning approval here.
BUILDING REGULATIONS
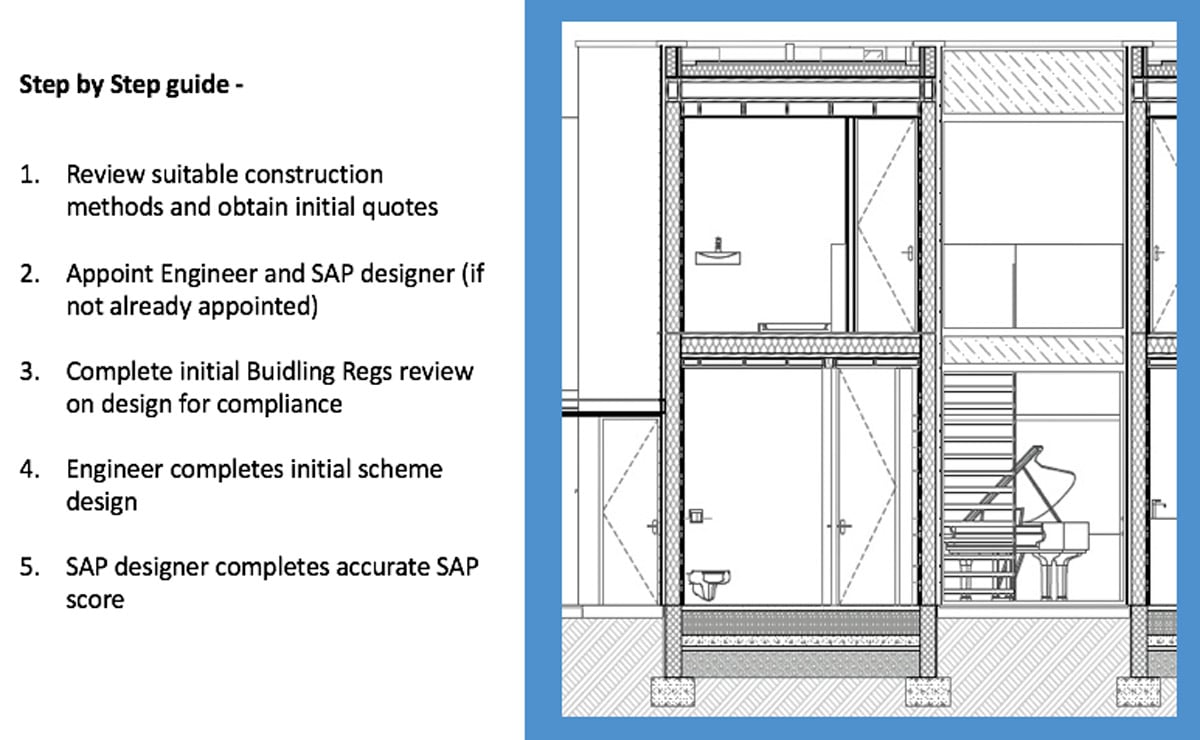
After your planning approval is granted, it’s time to move on to the building regulations certification process. At this stage you will be involved with your architect, engineer, the energy assessor and the building regulations certifier or local Building Control team in Scotland.
In the beginning of this stage you will need to choose the construction method you want to implement. Whether you will choose SIPs, timber frame, brick and block or ICF for your Self Build, you will need to appoint your other consultants and your architect will conduct a full building regulations review of the drawings to make sure, that everything complies (read more about various construction systems here). The engineer and the energy assessor will complete their initial designs and integrate them with the architect’s drawings. The final outcome of those should be fully reviewed by the client to make sure the design still matches your initial brief.
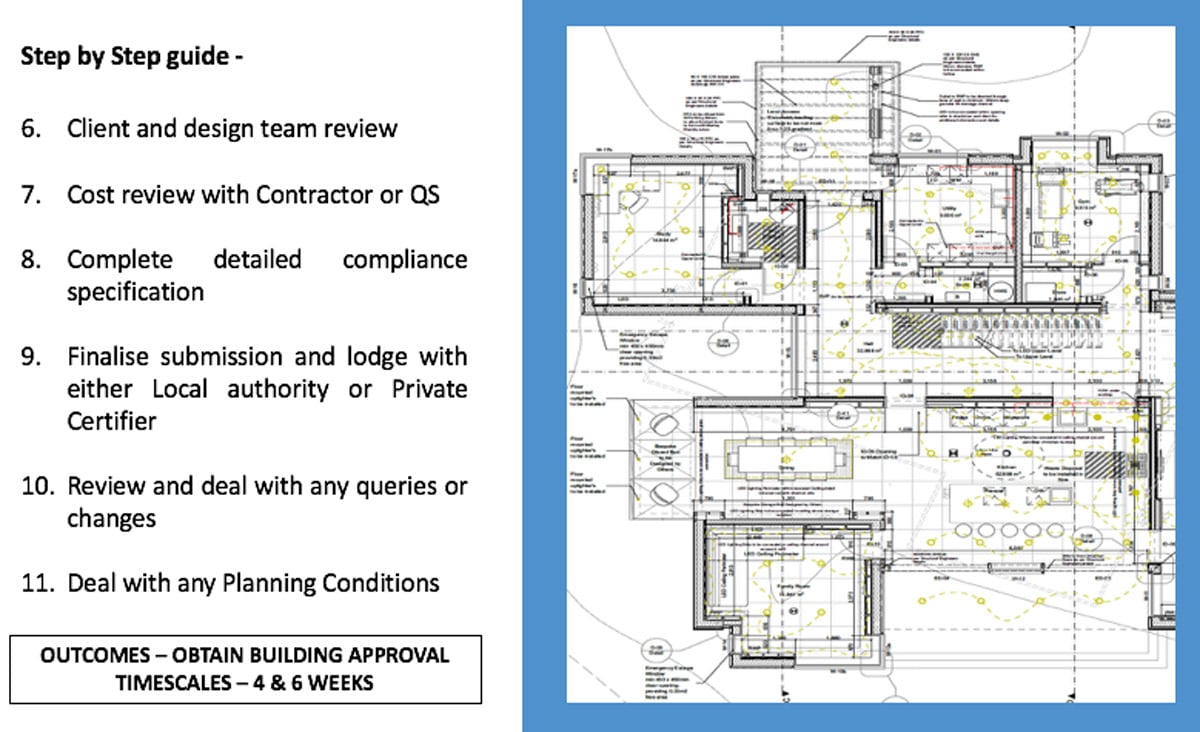
Areas that you will need to be involved with as a client is working out socket locations, lighting layouts, picking the materials, finishes and generally being involved in the detail decisions. In England and Wales you have the choice of sending the building regulations either to a private company or the local authority, while in Scotland there is only the second option available.
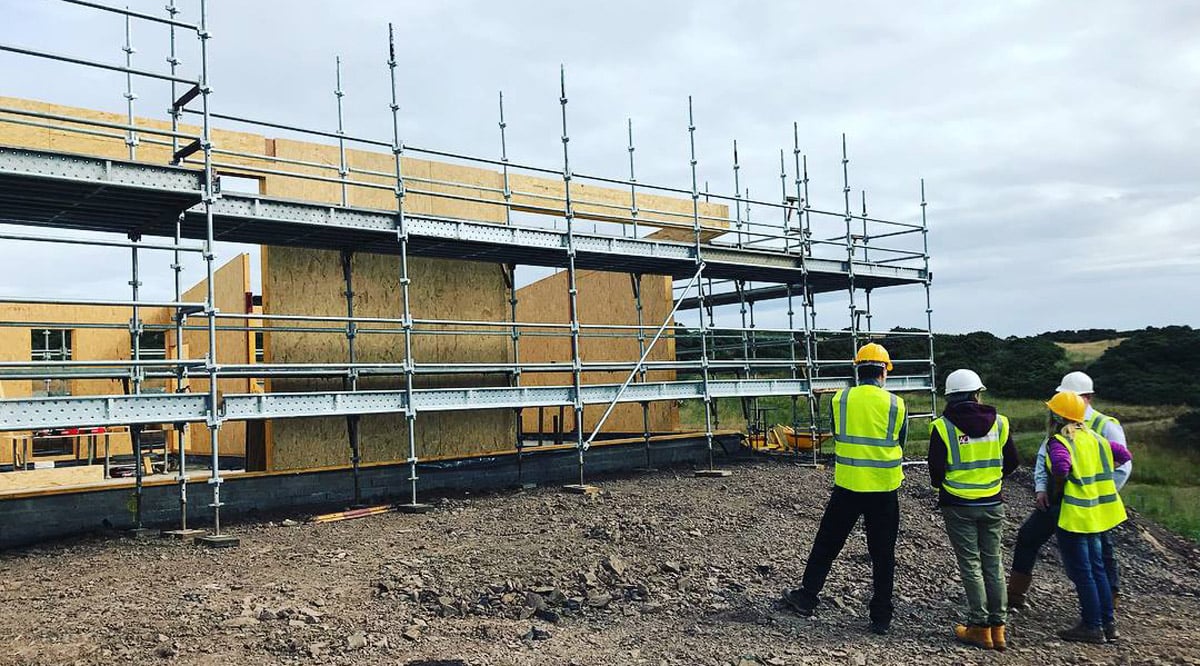
The review process should take around 6 weeks. Once you have this, you can actually start work on site. It is important to try and deal with any planning conditions as early as it is possible. It will let you avoid any enforcement action on suspensive conditions, that would delay the start of the construction works on site. This stage should take around 8 weeks to complete.
PRODUCTION OR CONSTRUCTION DRAWINGS
This stage is often missed out by self builders to try and save costs. However, if you want to be a typical self builder you need to make sure, that you can provide a contractor with as much information as possible. It will let them build exactly what you want and eliminate grey areas.
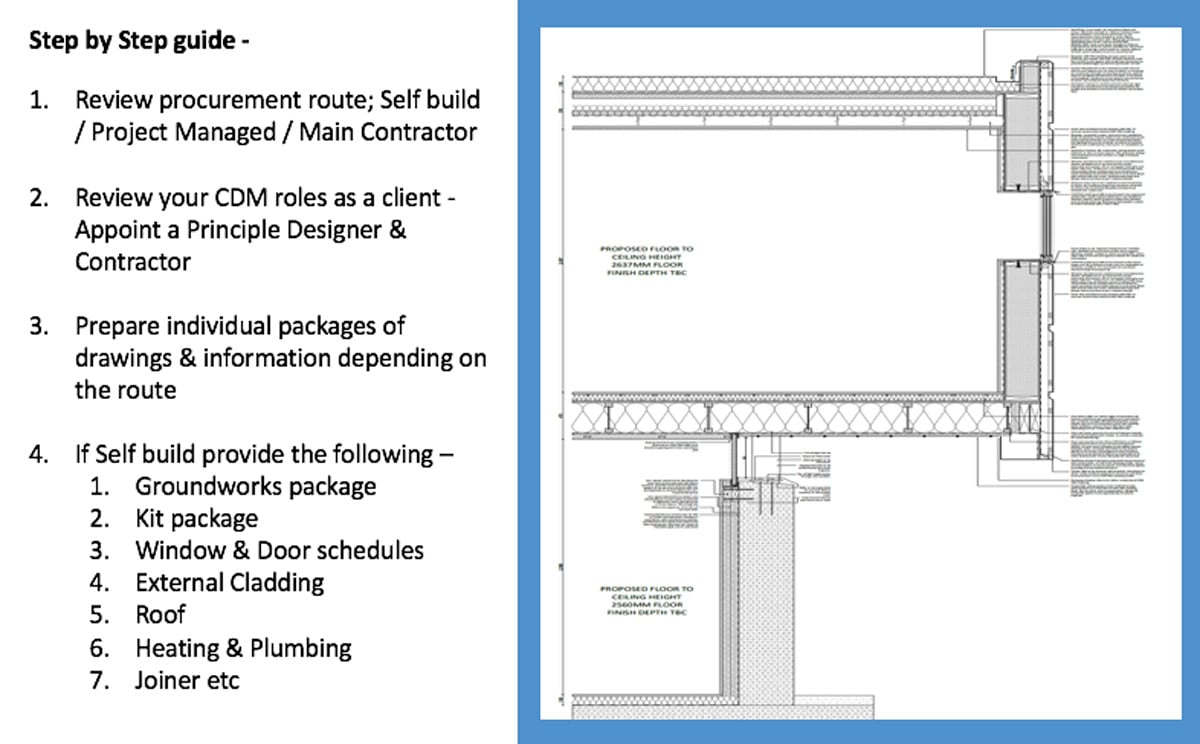
At this stage you will work closely with your architect, engineer, SAP assessor, contractors and CDM co-ordinator. In the beginning, you need to decide which procurement route you are going down. Is it going to be a full Self Build, is it going to be project managed or are you going to appoint a main contractor.
The option that you choose will hugely impact your budget, the amount and the type of information required. If you choose full Self Build route, where you are required to appoint individual contractors, you will need individual drawing packages for the ground worker, the kit manufacturer, the window and door supplier, external cladding, the roofer, the joiner etc. You need to make sure that you have all this information on hand or be able to provide them when asked.
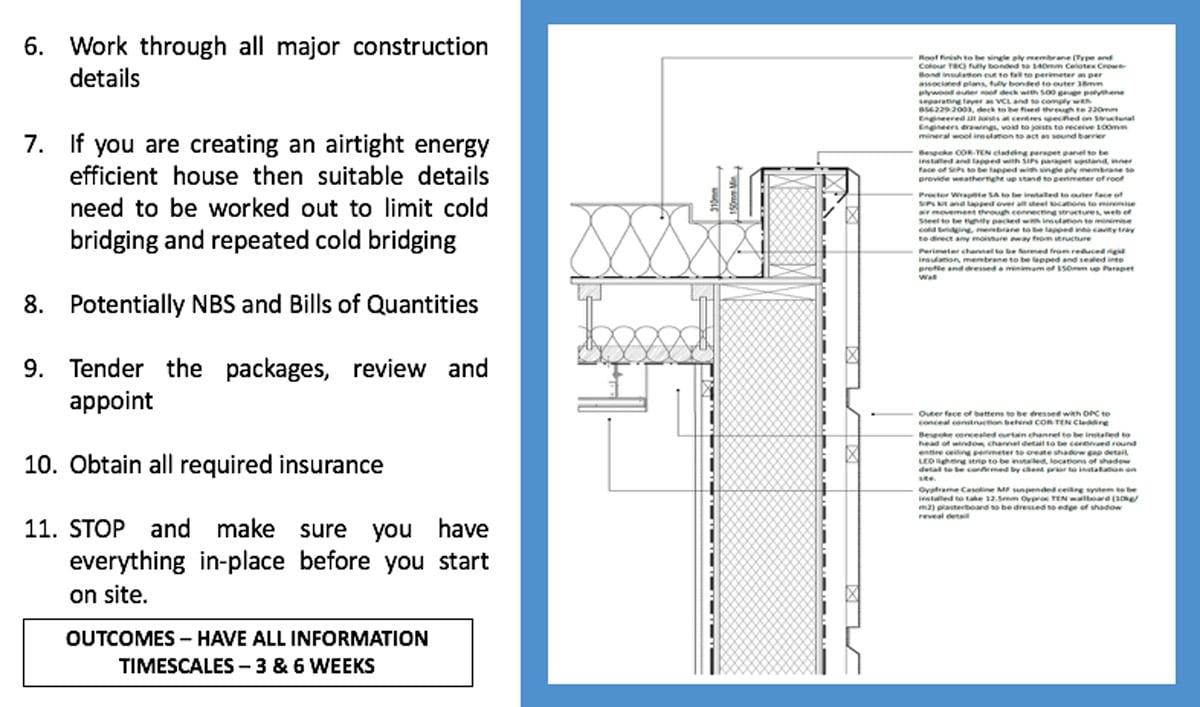
Then your architect will detail out all of the major construction elements. If your priority is to build a low-energy house, they will have to plan all the details to eliminate cold-bridging and make sure that the optimal air-tightness value can be achieved. If you are going for a main contractor route or project manager, a bill quantities and potentially a full NBS building specification will be completed. All those documents will be then given to three or four of each contractor, and then the quotes will be reviewed and the preferred contractors appointed.
It is vital to remember to secure your latent defects insurance policy, prior to starting any work on site. This is a 10-years insurance policy that insures the building for the next owner. If the next owner requires a mortgage, you must have a latent defects policy to finalise the deal. If you get this before starting the construction process it could cost as little as £2,500. However, if you apply for it after you have started digging the foundations, it may cost £20,000!
After you go through all those stages you are ready to start building your dream home.

Summary:
- Get as much information about the site from the very beginning.
- Communicate with your team regularly and review every design aspect.
- Make sure that your design and access statement is well done.
- Deal with your planning conditions as fast as possible.
- If your planning approval is not granted consider asking a planning consultant for help.
- Make a conscious decision about which procurement route you are going down – it will affect your budget and the amount of responsibilities on site.
- If your priority is to build a low-energy house, plan all the crucial details precisely.
- Secure your latent defects insurance policy prior to starting any work on site.
- Remember, it is your dream home. You have to love it!
A step-by-step guide to designing your dream home series is based on a talk created and delivered by Allan Corfield for Homebuilding and Renovating Shows. If you have any questions for Allan and the rest of the team, send your suggestions to us via email, or book your consultation here.


