
Many people want to create a home that is as energy-efficient as possible. Therefore, it is no surprise that Passive Houses have become increasingly popular among self-builders in the UK. If you're thinking about building a Passive House, you've come to the right place.
Read on for Part 2 of 10 things that you should know before building a Passive House. If you haven’t read the first part, you can find it here.

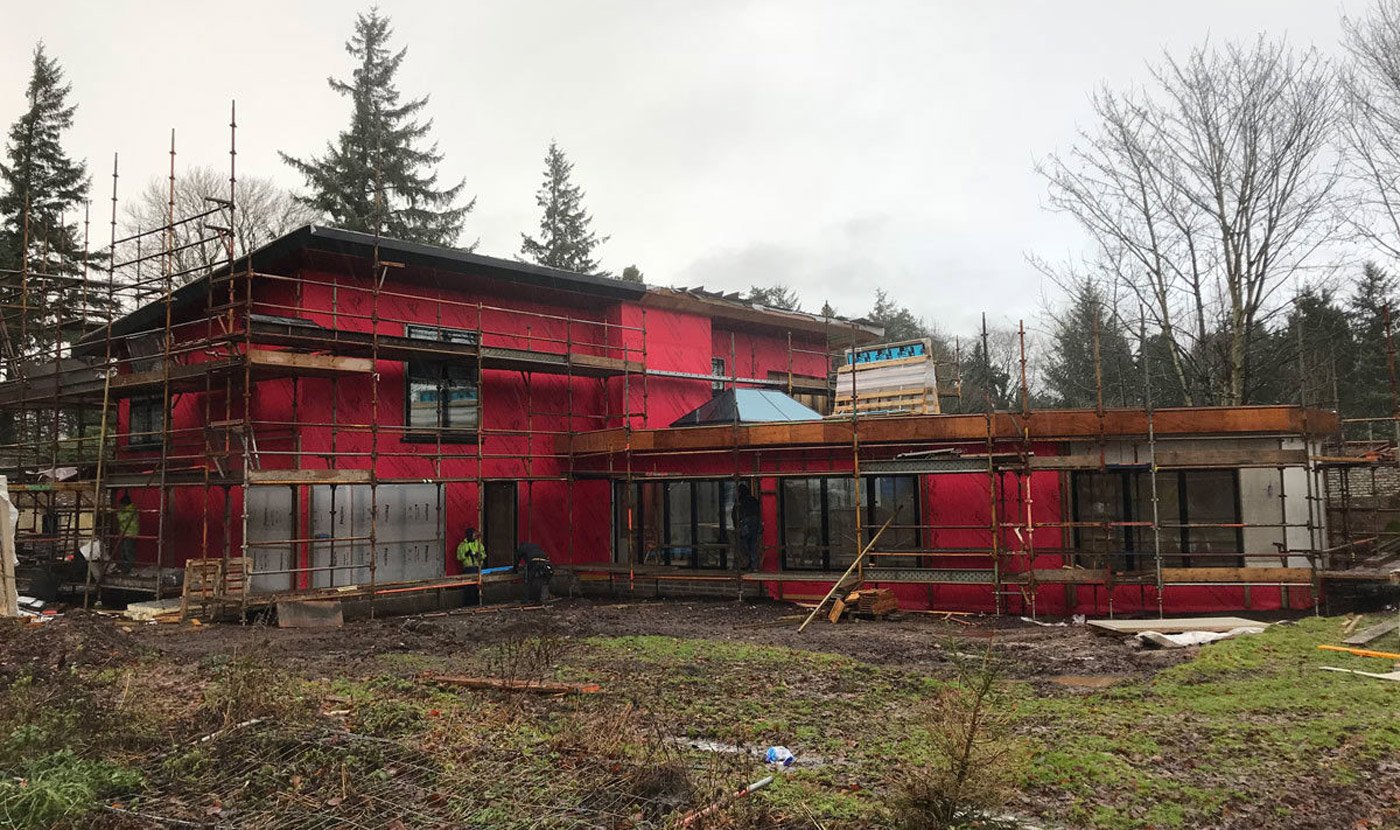
6. BUILDING FABRIC AND THERMAL ENVELOPE
Once you have the design of your building finalised and the required performance determined, it is time to start specifying the products and materials that will be used on the build. One of the most important elements of this process is deciding on the building fabric components for the project. The best way to do this is by adopting the 'Fabric First' approach.
As I’m sure you already know, at this point there are a number of options available to you when it comes to the method of building your house.
Ultimately, making your final decision may take some time and should be discussed fully with your Architect to determine the best fit for your project. Many factors need to be considered such as cost, build time and performance just to mention a few.
 Before going any further with this section, it is important to set out a few additional pieces of information. A structural engineer is a must for all construction projects, especially a Self Build project. The structural engineer will be responsible for all structural requirements for the project. Kit manufacturers often have an in-house engineer that will provide the engineering for the manufacturer’s kit. However, it is important to appoint your own structural engineer that will oversee the entire project over and above just the building fabric.
With a number of design professionals now contributing to the project, it is important that the fact that you are designing to the Passive House standard is still maintained. Pay particular attention to areas of the construction where two or three building components intersect. These areas will need to be detailed as part of the construction package, although these are also potential thermal bridging risks. These areas should be discussed with the design team so that thermal bridging is minimised or removed entirely.
Floor: This will include the foundations for the building and the ground floor construction. The foundations will be determined by many site and design specific factors.
The structural engineer will largely determine the type of foundations that will be used for the project based on the design and ground conditions. Even though the design for the foundations will largely be determined by the structural engineer, the materials used in this area will be critical for avoiding thermal bridging where the foundations meet the wall components. There a number of products available to serve this purpose as well as foundations systems that incorporate external insulation to remove any potential thermal bridging.
Other things to consider in this area would be the use of a screed above the floor slab and also whether underfloor heating will be incorporated into this screed. These topics will be covered in more detail in the services section of this article.
 Walls: There are a number of various options for the thermal envelope of the building as mentioned above. However, when building towards the Passive House standard the key areas to be aware of are creating a continuous thermal envelope, reducing thermal bridging and maintaining the air-tightness target.
To make these requirements as simple as possible the constructions types considered should quickly and easily allow these key areas to be achieved. The main systems that we have found to achieve this include closed panel timber frame kits, SIPS kits and ICF systems. These systems are generally quick and easy to install while reducing potential air-leakage through the kit and thermal breaks.
The size of kit and amount of insulation needed for your project to achieve certification will depend on several factors. This information should be entered into the PHPP calculation to determine specific requirements that are customised to both the site and the design.
Generally, there will be a requirement for between 250 – 300mm of insulation within the floor, walls and roof of the building. One of the Passive House criteria is that all U-values for the building are below 0.15W/(m2K). However lower U-values may be required across the UK and as a general rule of thumb U-values of between 0.11 – 0.12W/(m2K) are required in the North such as Scotland.
Roof: The last, but certainly not the least, thermal envelope component to consider is the roof. Again, these will be determined by the design of the building as to whether it’s a pitched roof, a flat roof, with vaulted ceilings or trusses and loft space.
The same things apply to the roof as applies to the walls. However, there are a few other things to be considered. There tends to be more going on within the roof, such as structural supports, electricals, lighting… etc. All of these can have an impact on the performance of this component although it can also have an impact on the look of the building as well.
Roof insulation is often slightly thicker than the wall insulation. Also, worth noting is that SIPS or closed panels kits don’t have a space for downlighters, therefore if these are desired a large amount of battening out from the kit will be required. Similarly, a flat roof must have any required insulation on the outside to create a work roof construction. Both of these scenarios can add significant depth to an already deep construction due to the amount of insulation used in a Passive House. These are not issues, although they should be considered at the design phase so that any impact can be minimised.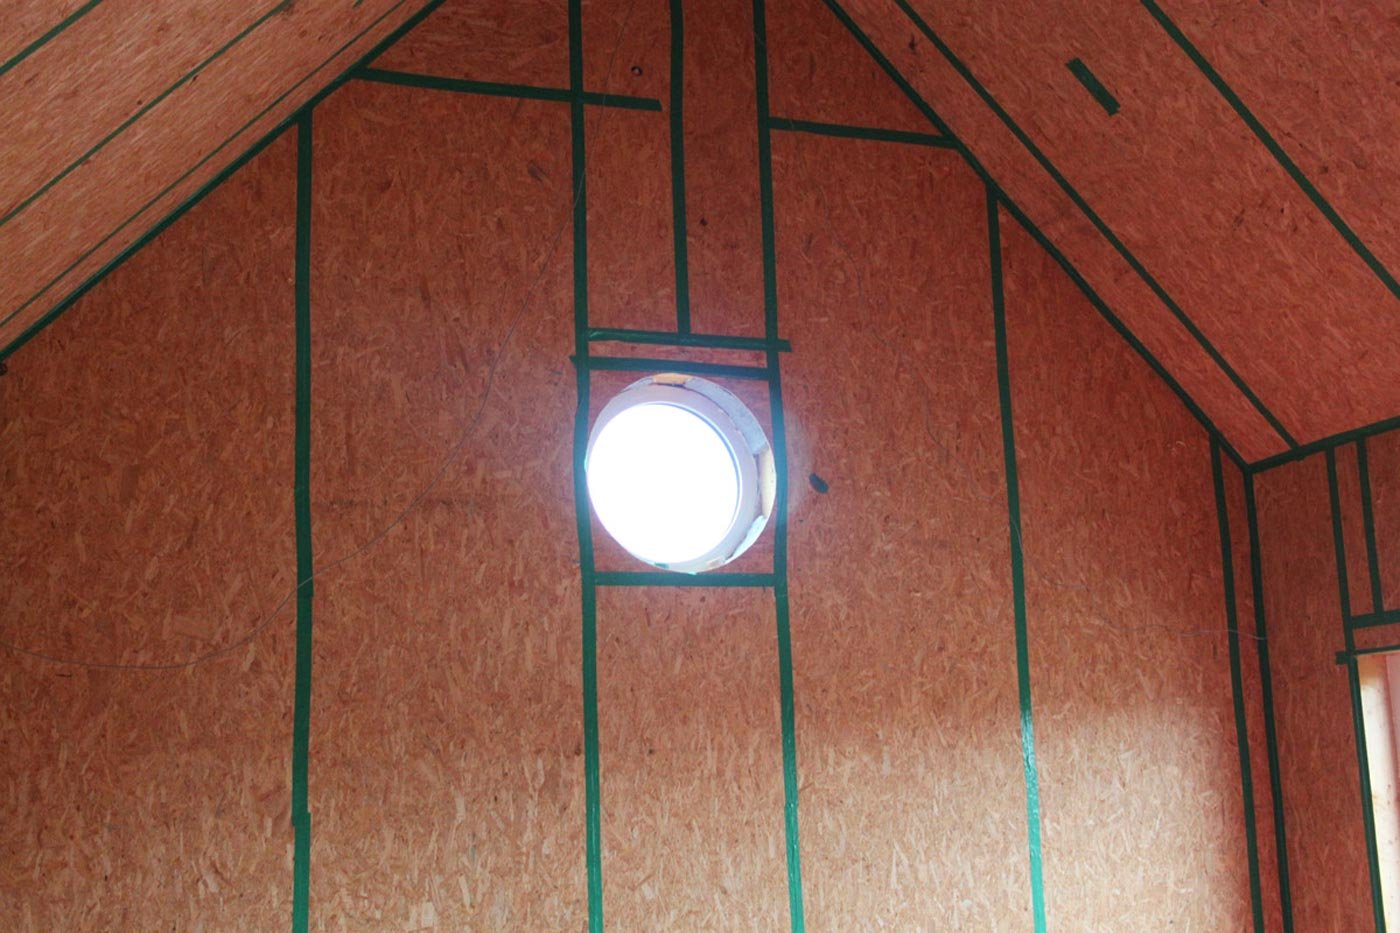 7. AIRTIGHTNESS IS NO JOKE!
So, as the title indicates airtightness is no joke and this is never truer than on a Passive house build. The airtightness requirement for a certified Passive House is below 0.6 ac/h which is 10 – 15 times more air-tight than a conventional building. The airtightness can have an impact on the thermal performance, the internal air quality, the operation of the MVHR system as well as several other things. It’s one of the most critical parts of your Passive house build and if not approached properly will prove to be the greatest hurdle to overcome and could be the thing that prevents certification entirely.
These days there are a lot of approaches to achieving airtightness, and the path you choose will largely be determined by the method of construction. ICF constructions, for example, have a very good inherent airtightness as the kit has a continuous concrete core that runs around the construction. You will still, of course, need to deal with airtightness around windows, doors and service penetrations.
Generally speaking, beyond masonry construction, there are three ways to tackle air-tightness (roughly):
Option 1 – You can use air-tightness tape to tape and seal the joints on the inside of the kit. Additional membranes and tape are required to provide airtightness at floor level, around windows, doors and service penetrations.
Option 2 – The use of an internal air-tightness membrane (such as Pro-Clima intello membrane) taped and sealed with air-tightness tapes and collars. As above additional tapes and membranes will also be required to provide air-tightness at floor level, around windows, doors and service penetrations. Pre-planning is also required when using membrane so that membranes can be applied around intermediate floor junctions and above ridge beams prior to installation so that continuous membrane coverage is achieved.
Option 3 – For a more straight forward and simple approach you can use a spray or paint on a membrane (such as passive purple). Some additional tapes and collars may be required with this system although not to the same extent as option 1.
All Passive House projects will require an airtightness champion for the duration of the air-tightness installation, usually after first fix all the way through to the completion of the project, who has learned and understands the products and materials that are being used, will take responsibility for installation and will also maintain that all work carried out on site will not have a detrimental impact on the airtightness for the build. You can find out more about airtightness here.
 8. MVHR AND SERVICES
The MVHR or mechanical ventilation with heat recovery is the heart of any Passive House building. The operation of this system provides clean fresh air that has been pre-heated to reduce internal heat loss whilst also reducing the buildings heating load requirement.
MVHR ducting will be required throughout the building to serve all rooms that will require an MVHR supply or extract grill. The MVHR is a balanced system and will provide equal amounts of air supplied and extracted from appropriate rooms within the building. Supply rooms will include a lounge, dining room, and bedrooms. Extract spaces are areas that create excess heat and humidity such as bathrooms, kitchen and utility room. Beyond the unit and ducting, the most common MVHR components include crosstalk silencers, a defrost unit to pre-warm the intake air in the winter and a post heater to help boost the internal air-temperature if required.
The most important thing to know about an MVHR system is that it does not replace a heating system. The building still has a heating load and an appropriate heating system that is capable of fulfilling this load should be specified. The MVHR system can provide heat to the building in small amounts. Although it should not be used as a replacement for a dedicated heating source.

General maintenance will be required for the MVHR unit however this will mainly consist of filter changes between 1-2 times a year. The frequency that filters are changed will depend on the use of the system and the external contaminants that are being removed from the incoming air.
Other services for a Passive House building are the same as a conventional house. However, the energy and heating load for the building will be dramatically reduced. All systems should, therefore, be sized appropriately with predicted performance being taken from the PHPP calculation.
9. THE CERTIFICATION PROCESS
The decision to certify is not one that should be taken lightly. That said, it is better to know your intentions before you embark on your Self Build journey. It will take more time and add more cost to the project if you suddenly decide you want to achieve Passive House certification halfway through the build.
The process of certification will start from the outset of the project, the PHPP is the first step in the certification process. The finished PHPP calculation along with a host of additional information will all be collected during the build and submitted to the Passive House Institute for certification.
This information includes the drawings for the project, a full set of construction details, verification that the building has been constructed as per these details, this is usually done by a series of site photos at different stages, a copy of the window and door order confirmation, datasheets for all insulation materials used throughout the project, a copy of the air-tightness test results, commissioning information for all main systems such as the MVHR unit, and so on.
As part of the certification process, you should have a certified passive house designer working on the design of the building with an approved PHI certifier overseeing the process and verifying the results. The completed information is then submitted to the PHI for approval and the Passive House certificate and door plaque is issued. You can find out more about certification here.
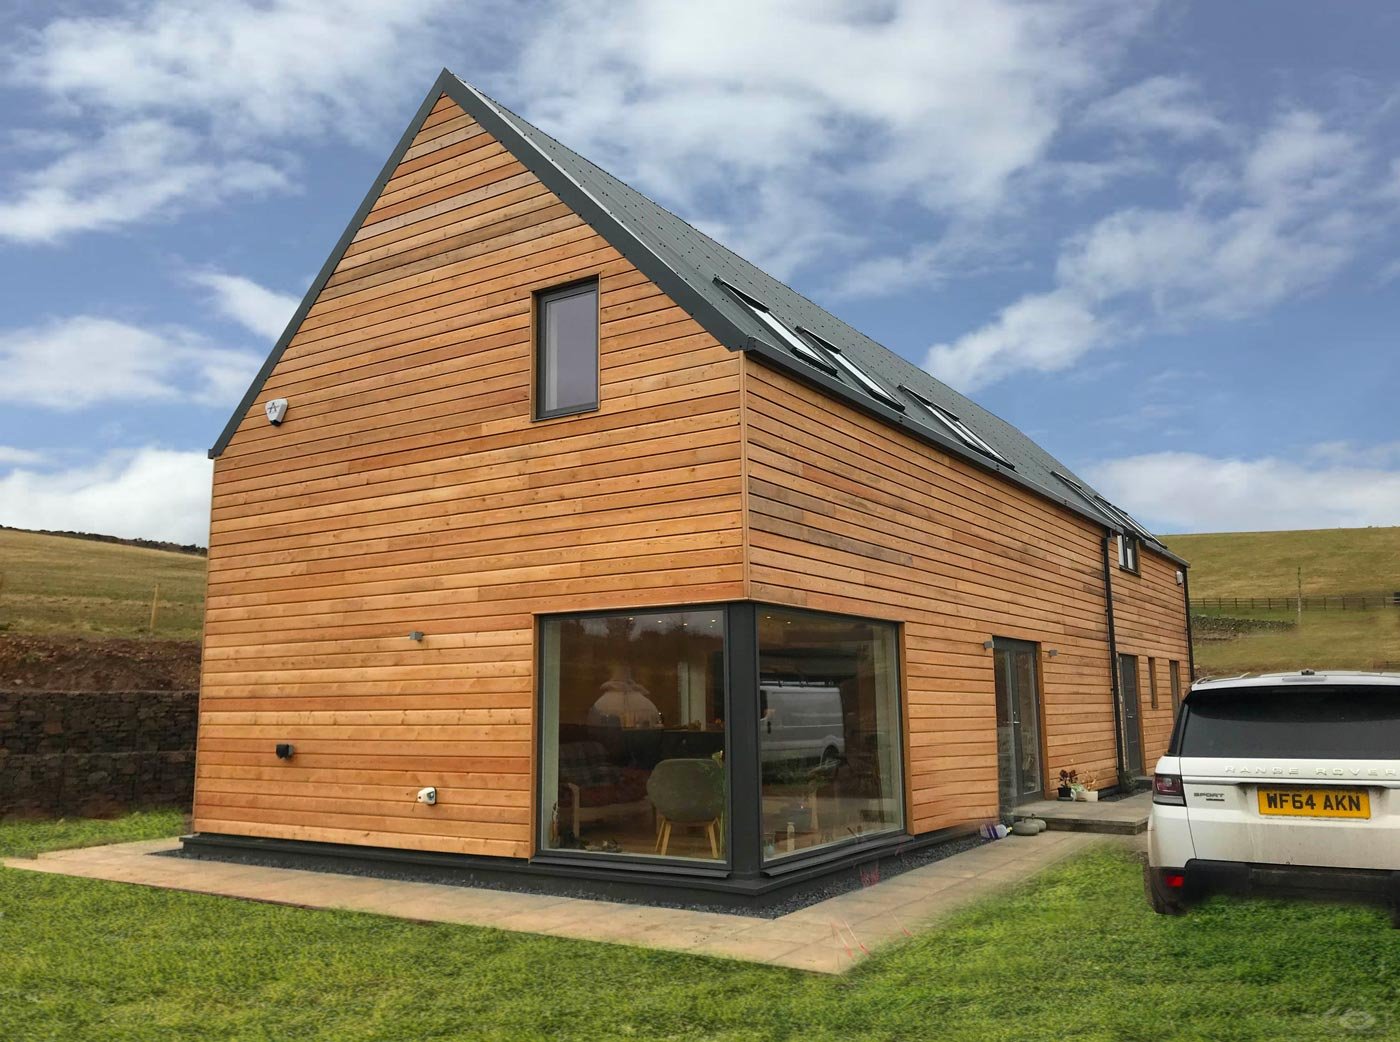
 10. LIVING IN YOUR PASSIVE HOUSE
You did it, you’ve survived your Self Build experience and you’ve just moved into your new Passive House. What should you expect?
So, on the whole, it’s just like a conventional house. Like all buildings, there will be a settling in period while things stabilise, and the building materials come up to temperature. However, there are a few areas where you may see some differences. For a start, the internal temperature of the building will be more stable than a conventional building. This should stay around 20°C in both winter and summer depending on the external temperature.
Some Passive House homeowners have reported that they experienced a dry throat and slight cough for the first three weeks after moving to their new home, which is due to the MVHR unit. Passive House building has an internal relative humidity level of between 40 – 70%. This sits in-line with the recommended guidelines for relative humidity (RH) levels within domestic buildings. RH levels in conventional buildings and older houses can often be higher than 70% due to poor ventilation which is why some people will find the air in a Passive House slightly dry. Just know that this is very normal and will pass very quickly.
Overheating is a real thing that can happen, even in Scotland. For the most part, the risk of overheating will be designed out of the building as much as possible based on the results of the PHPP. However, this may require some input from the residents, such as opening windows and doors as well as night time purging.
Beyond reducing overheating, there is no need to open windows for fresh air in a Passive House. You can, of course, open the windows if you prefer but not opening them means that the air entering the building is filtered via the MVHR. This will lead to the removal of pollen and other particles resulting in very high indoor air quality.
The MVHR can also be used to reduce humidity and moisture in the bathroom after use rather than opening a window. Most MVHR units can now be installed with a boost switch in the bathroom that will increase the ventilation rate in the bathroom for a short amount of time to remove excess moisture. This is also beneficial for the building as any additional heat generated in this room is recirculated through the building rather than lost out the window.
Beyond these small points, all that is left is to do is to sit back and enjoy life in your new energy-efficient, comfortable Passive House home.
In case you missed the previous articles of the Passive House Series, here they are:
This article is a part of Passive House Series where we describe various areas of building a home to achieve this certification. If you're interested in building a Passive House, click below for a free consultation with one of our experienced architects!
